
Jason Wood | Principal Consultant | 29 June 2018
Using a reverse proxy is often a simple way of significantly reducing the attack surface of your Internet-facing applications - if only authenticated users can access your potentially vulnerable applications, that's a significant decrease in exposure and stress! The challenge is making it seamless, and if you're an Office 365 / Azure AD-based organisation then using a combination of Apache, mod_shibboleth and Azure AD is a quick and easy way of achieving it.
By integrating with Azure AD using SAML you also get multi-factor authentication without having to worry about doing anything special as part of the configuration, assuming you've already made it available to your users.
In this demo we'll be building a reverse proxy using Apache that uses TLS for encrypting communications from the client to the proxy and from the proxy to the target as well as implementing authentication requirements for certain content using SAML and Azure AD.
The OS we'll use for the reverse proxy in this instance is Ubuntu 16.04.04 and assumes you have the base OS installed and DNS appropriately configured for the host that you're using - for the purposes of this demo it's going to be a host in our sandbox domain - demo.fsbox.org. Wherever demo.fsbox.org is referenced you should replace that with whatever domain name you are using for your host. Note that there are some domains considered high risk by Letsencrypt for which certificates cannot be issued - for example amazonaws.com.
Add the letsencrypt repository:
jason@demo:~$ sudo add-apt-repository ppa:certbot/certbot
This is the PPA for packages prepared by Debian Let's Encrypt Team and backported for Ubuntu(s).
More info: https://launchpad.net/~certbot/+archive/ubuntu/certbot
Press [ENTER] to continue or ctrl-c to cancel adding it

gpg: keyring `/tmp/tmpdgucyzbs/secring.gpg' created
gpg: keyring `/tmp/tmpdgucyzbs/pubring.gpg' created
gpg: requesting key 75BCA694 from hkp server keyserver.ubuntu.com
gpg: /tmp/tmpdgucyzbs/trustdb.gpg: trustdb created
gpg: key 75BCA694: public key "Launchpad PPA for certbot" imported
gpg: Total number processed: 1
gpg: imported: 1  (RSA: 1)
OK
Update the package libraries:
jason@demo:~$ sudo apt-get updateInstall all of our dependencies:
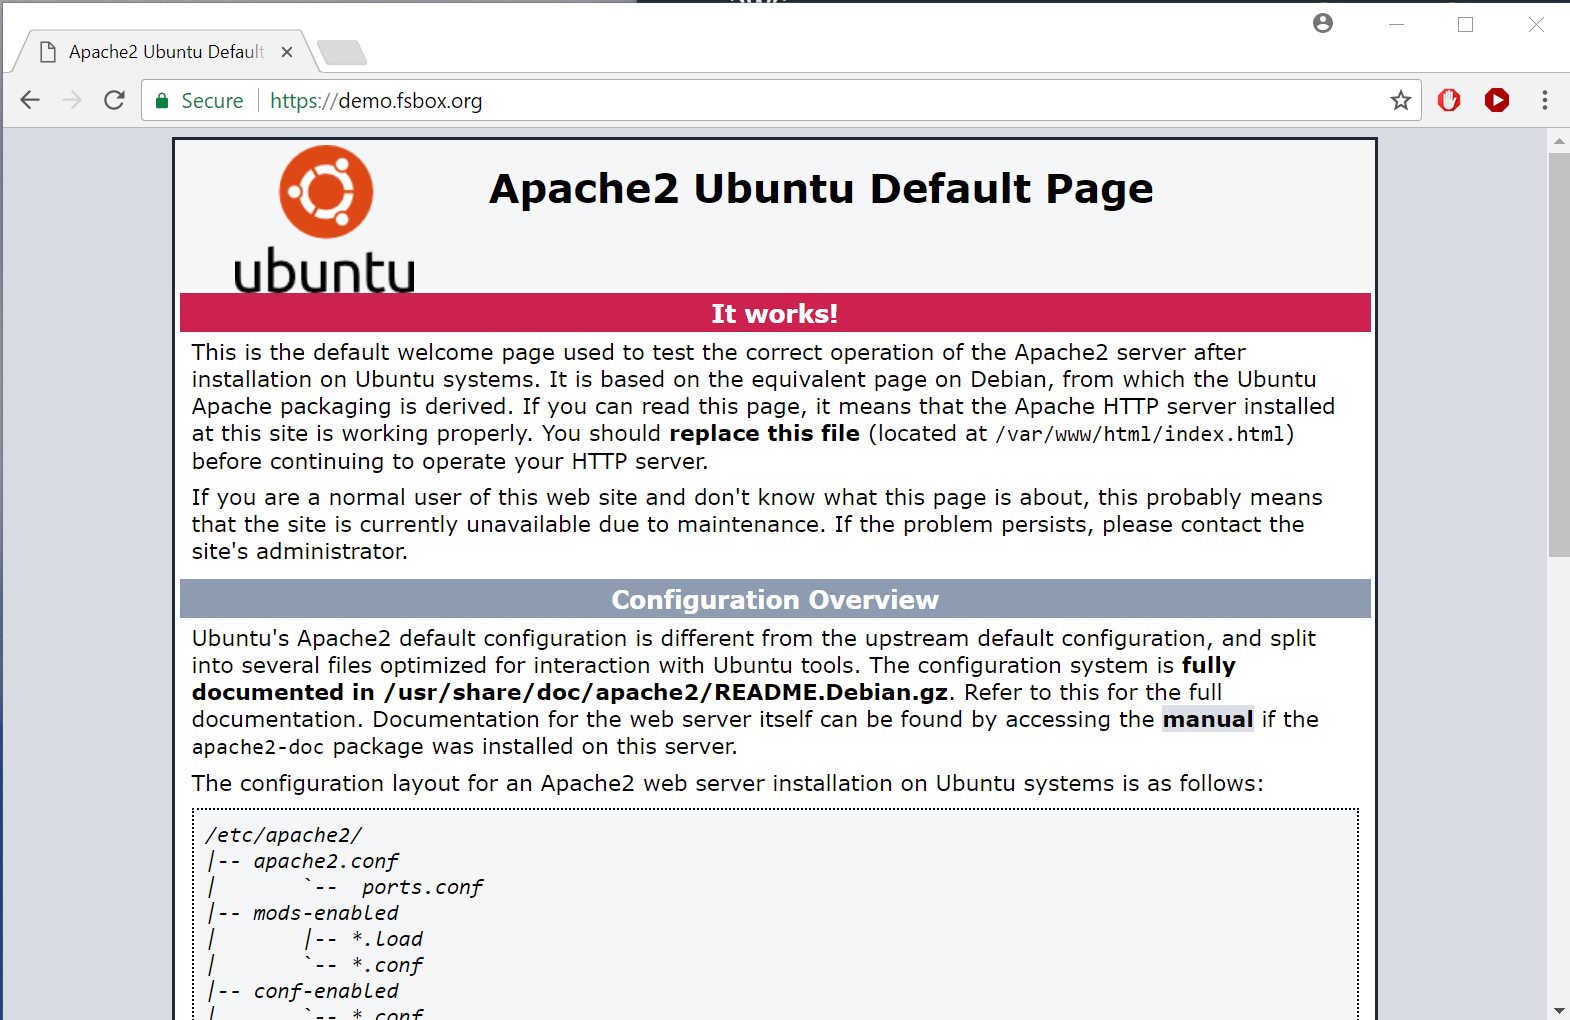
jason@demo:~$ sudo apt-get install apache2 python-certbot-apache libapache2-mod-shib2That should leave you with a vanilla Apache installation, in our case at http://demo.fsbox.org/:

With the launch of letsencrypt there is really no reason not to run TLS everywhere nor to use self-signed certificates, even for testing.
Install letsencrypt - make sure to enable redirects to SSL if you don't want to go and play with Apache configs later on. You will need to have both port 80 and 443 accessible from the Internet for this to work. You can pass multiple domains with the -d parameter - for example if you wanted to support www.demo.fsbox.org and demo.fsbox.org:
jason@demo:~$ sudo /usr/bin/letsencrypt --apache \
	--email "security_admin@fortian.com.au" -d demo.fsbox.org

	....

Please choose whether or not to redirect HTTP traffic to HTTPS, removing HTTP access.
-------------------------------------------------------------------------------
1: No redirect - Make no further changes to the webserver configuration.
2: Redirect - Make all requests redirect to secure HTTPS access. Choose this for
new sites, or if you're confident your site works on HTTPS. You can undo this
change by editing your web server's configuration.
-------------------------------------------------------------------------------
Select the appropriate number [1-2] then [enter] (press 'c' to cancel): 2
Enabled Apache rewrite module

-------------------------------------------------------------------------------
Congratulations! You have successfully enabled https://demo.fsbox.org

You should test your configuration at:
https://www.ssllabs.com/ssltest/analyze.html?d=demo.fsbox.org
And if we refresh http://demo.fsbox.org/ it now redirects to the TLS-protected version:
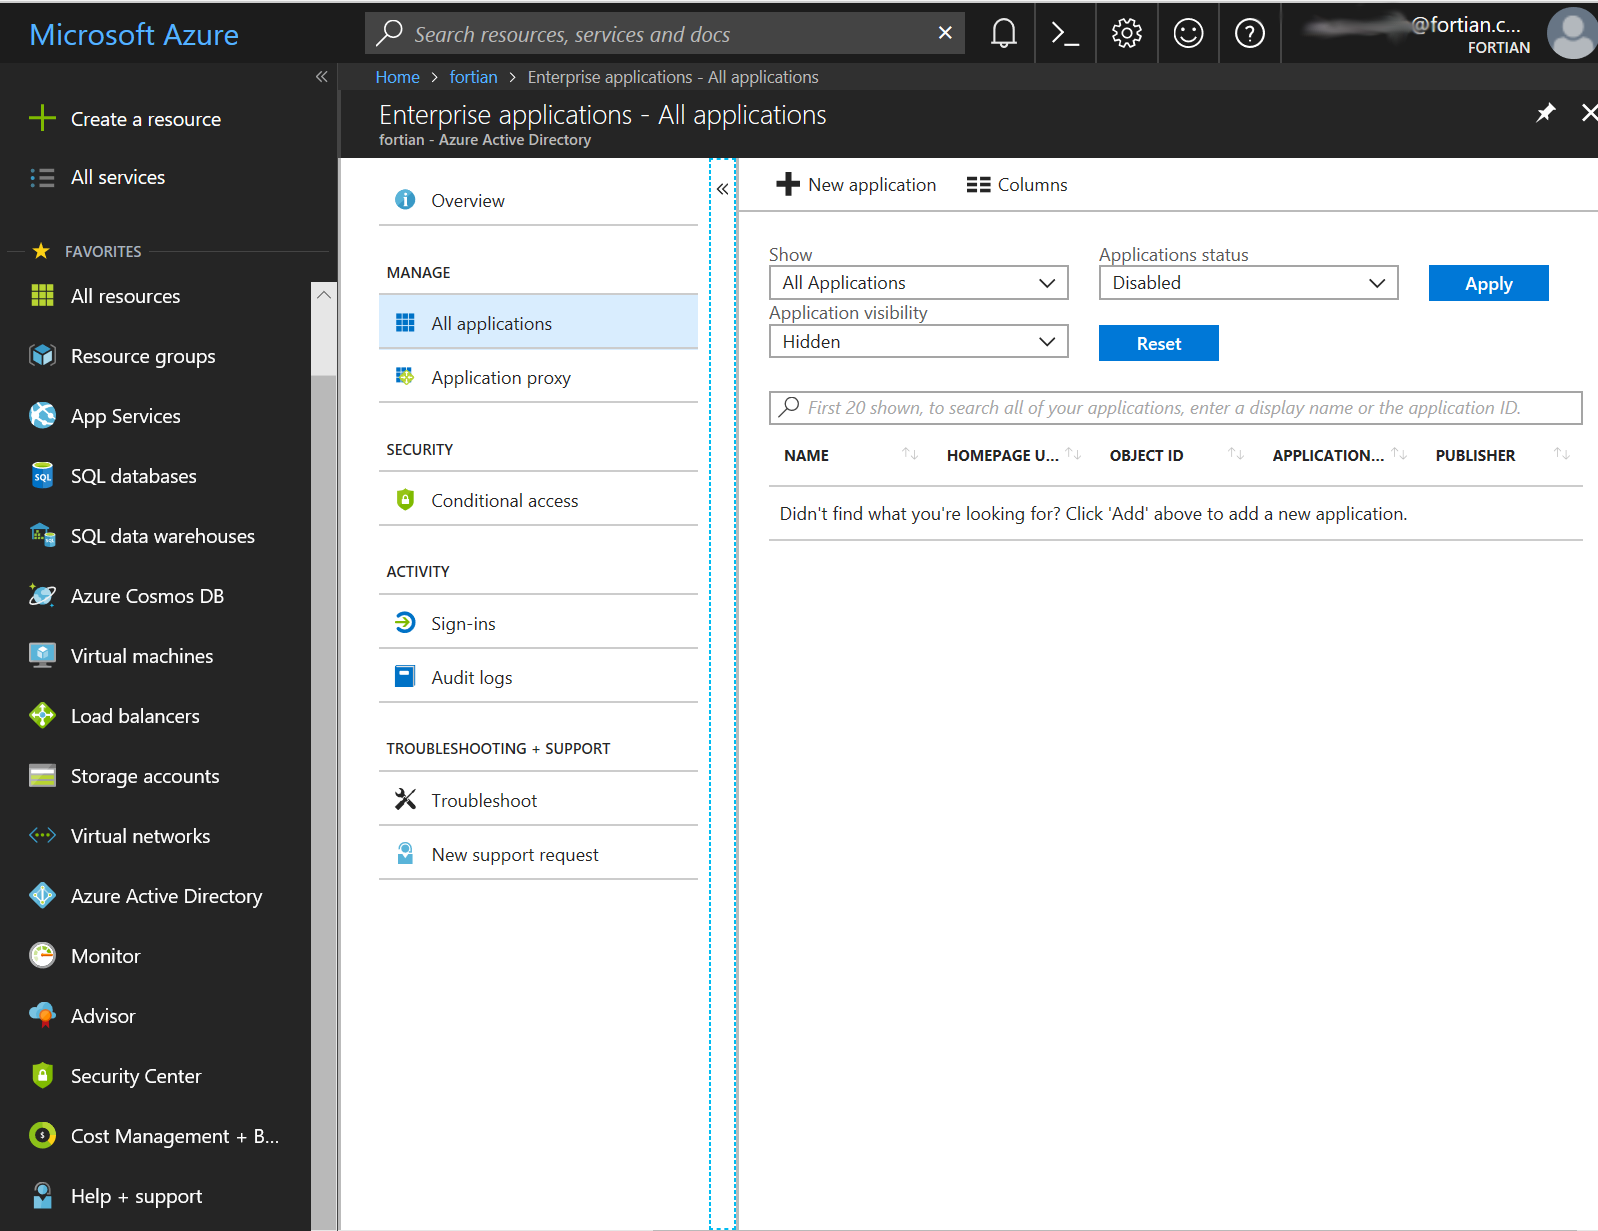
From Azure AD, select Enterprise Applications and then "+ New application":
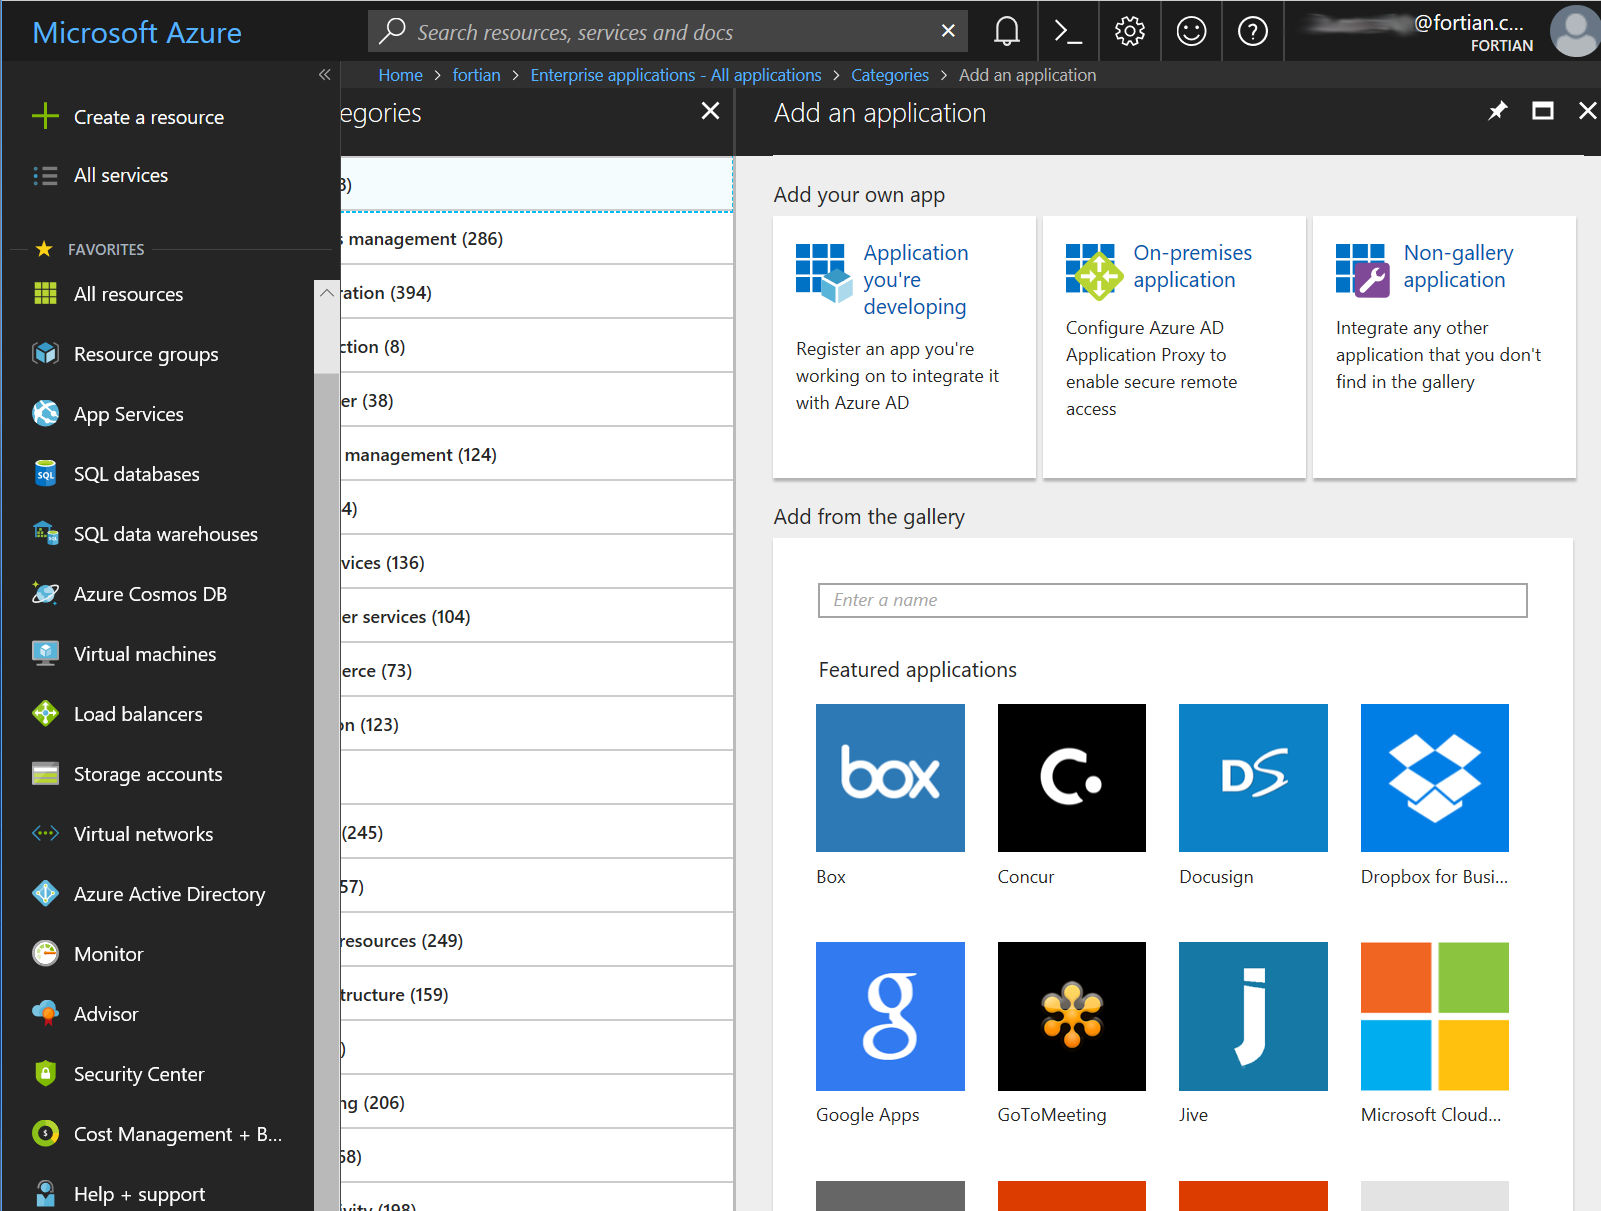
Then select Non-gallery application:
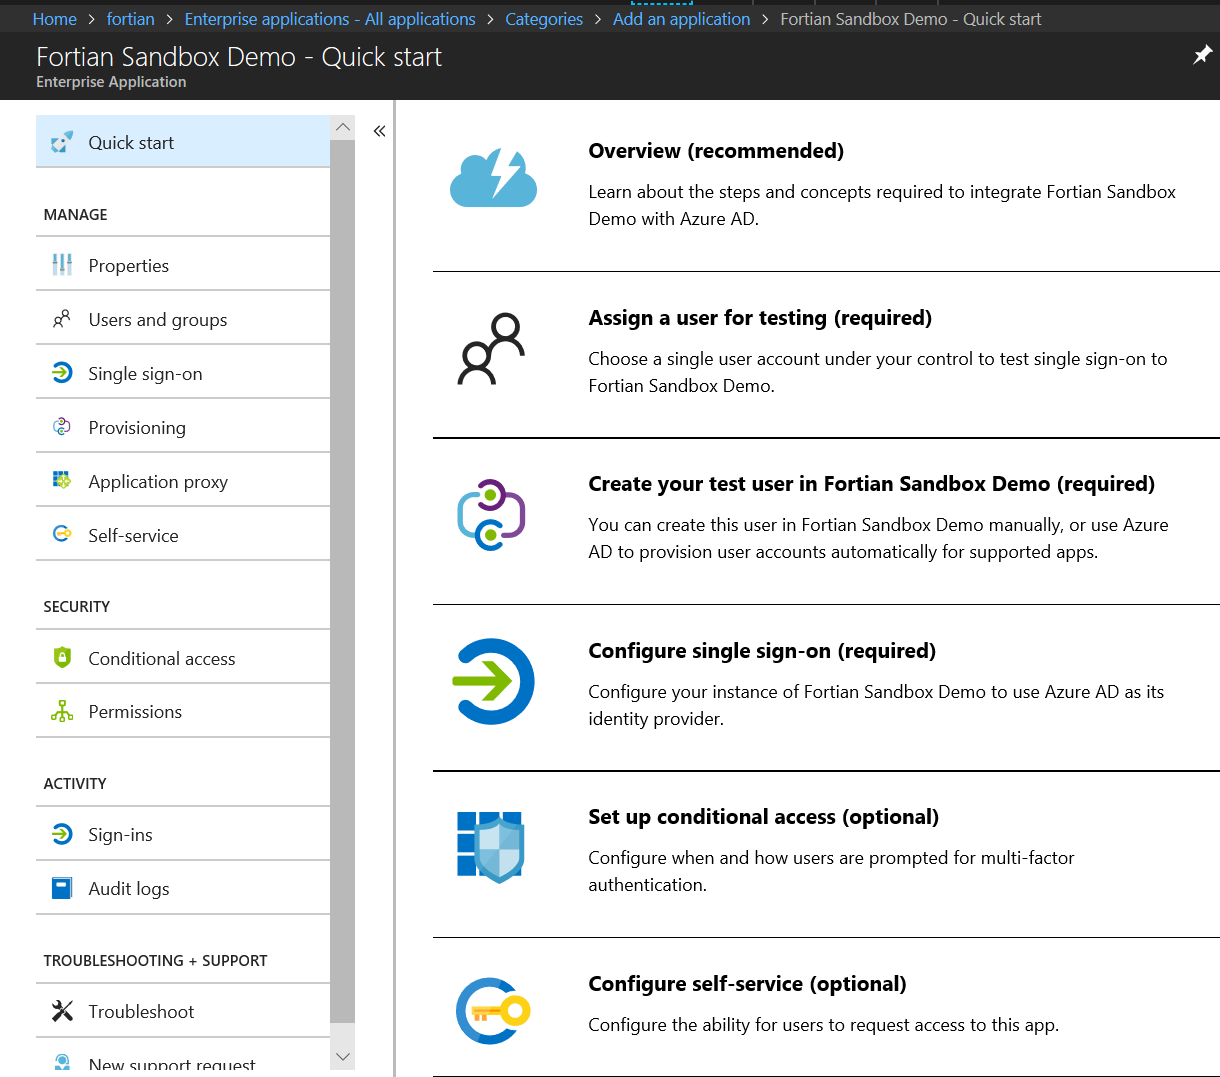
Give it a name and click add - in our case it's Fortian Sandbox Demo:

And after a bit of a wait....

... you'll be taken to your new application config:
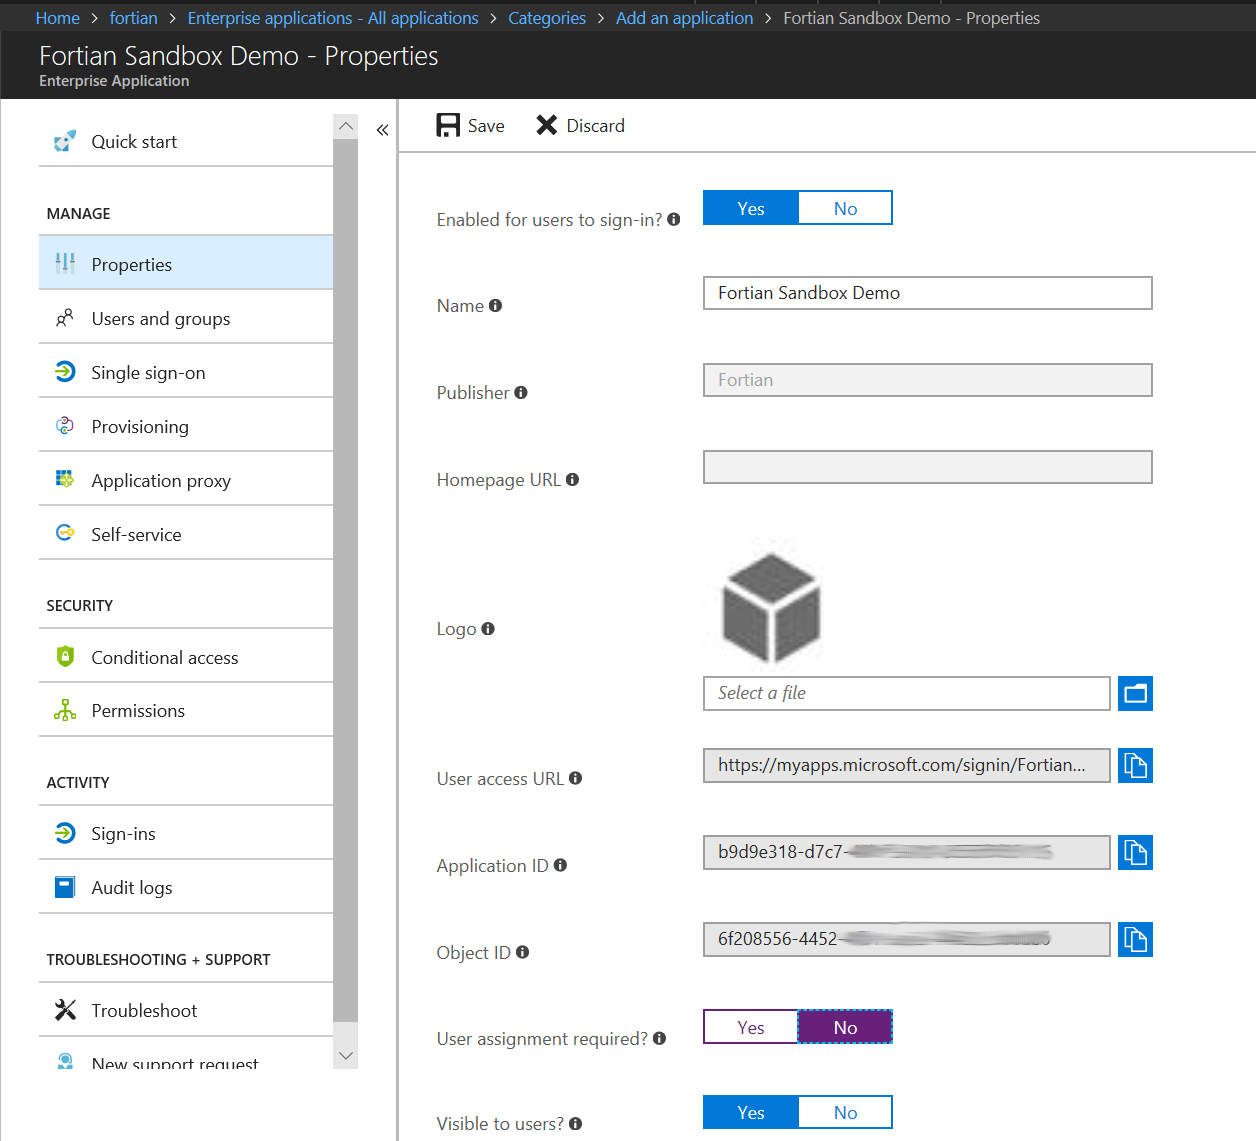
Because we're trying to create a reverse proxy, we'll assume that other applications are going to do more fine-grained access control and therefore for this initial control we will simply allow all of our valid AD users access. In the Properties tab, set "User assignment required" to No and then hit Save:
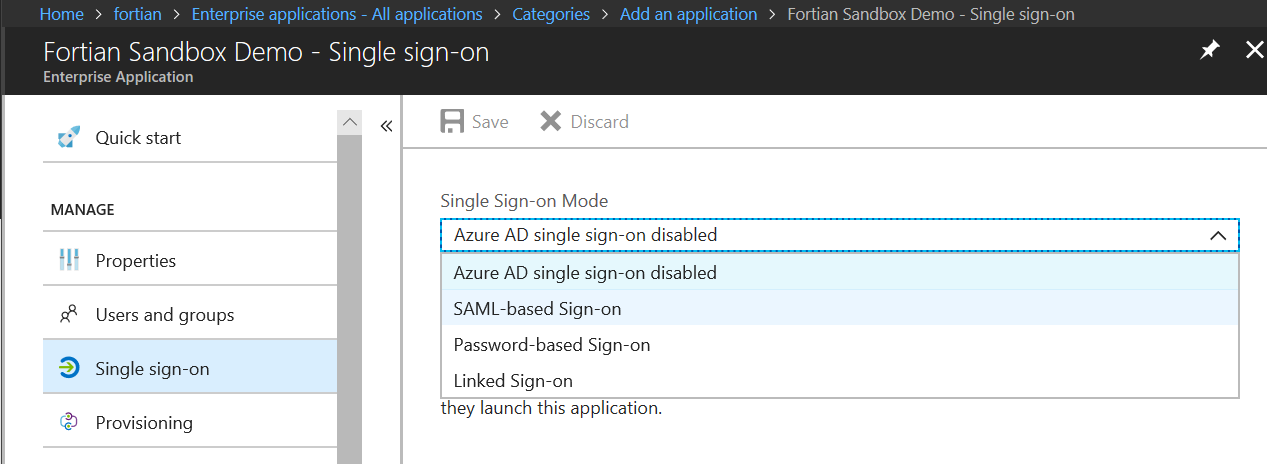
Next it's time to configure SSO. On the Single sign-on tab set the single sign-on mode to SAML-based Sign-on:
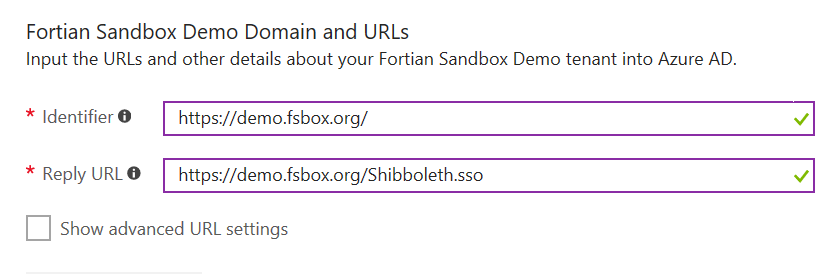
Set the Identifier and Reply-URL for your applications. Use Shibboleth.sso as the default for the Reply URL - if you use something else here you will need to make corresponding changes to the Apache configuration file later in the process:
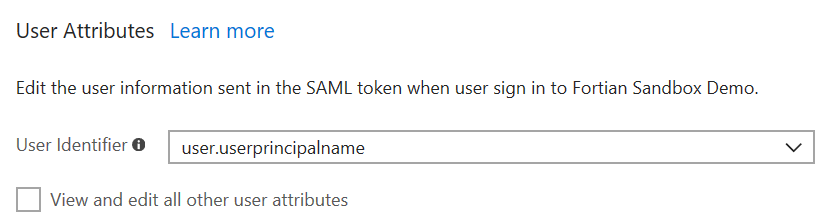
Leave the User attributes untouched at this point - we might do a walk through of attribute assertion in a future post:
You will have a certificate, but the status will be set to new. You need to activate the certificate before you can use it:
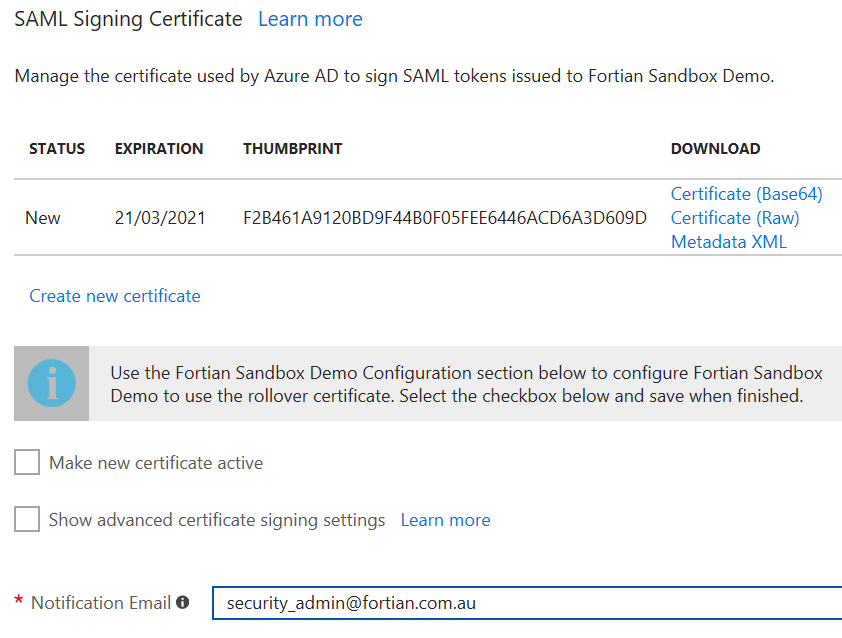
With all of those changes complete, press the Save button.
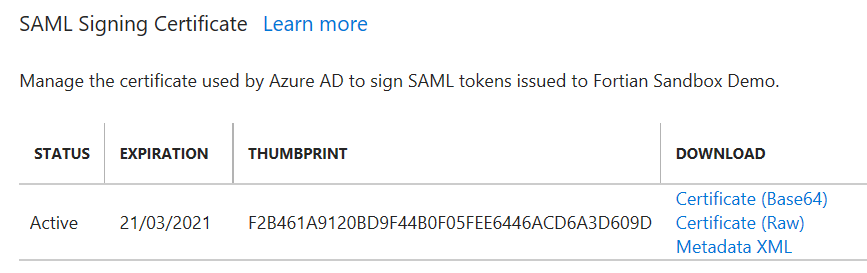
Another little wait...

...and you should now have an Active certificate:
Next, we need to get the metadata, which will be used to provide the Azure AD configuration to the reverse proxy. Download it from Azure using the Metadata XML link and copy it to your proxy:
jason@u-jwsl:/media/sf_Downloads$ scp Fortian\ Sandbox\ Demo.xml jason@demo.fsbox.org:/tmpAnd now on to the Shibboleth configuration!
Copy the new Metadata file into the /etc/shibboleth directory. I'm changing the name to make it a bit more generic at the same time:
jason@demo:/etc/shibboleth$ sudo cp /tmp/Fortian\ Sandbox\ Demo.xml ./federation_metadata.xmlAnd set the permissions appropriately:
jason@demo:/etc/shibboleth$ sudo chmod 644 federation_metadata.xmlOpen up the metadata file (federation_metadata.xml) and obtain the entityID - you'll need this for the subsequent shibboleth configuration:
<?xml version="1.0" encoding="utf-8"?><EntityDescriptor ID="_8c425120-3772-587c-13c3-78a40aaa6240"
	entityID="https://sts.windows.net/625a4e23-25ba-538a-c24c-32731af477bc/"
	xmlns="urn:oasis:names:tc:SAML:2.0:metadata">
Now edit the Shibboleth configuration file (shibboleth2.xml). Firstly, update the ApplicationDefaults entityID to the Azure AD identifier configured earlier:
<ApplicationDefaults entityID="https://demo.fsbox.org/"
	REMOTE_USER="eppn persistent-id targeted-id">
Then update the SSO entityID to the Azure AD entity ID you obtained a few steps ago from the metadata file, and remove the discoveryProtocol and discoveryURL:
<SSO entityID="https://sts.windows.net/625a4e23-25ba-538a-c24c-32731af477bc/">
	SAML2 SAML1
</SSO>
And finally add in a field to specify the location of the metadata information. In this case we're using the local file that we transferred from Azure AD, but it is also possible to obtain the metadata in real-time using a URL (something that may be explored in a later post):
<MetadataProvider type="XML" file="/etc/shibboleth/federation_metadata.xml">
</MetadataProvider>
One other particularly interesting config file is attribute-map.xml, which as the name suggests, provides the ability to map SAML attributes, but we'll get into that in another time.
With the shibboleth configuration done, let's do a quick configuration in Apache just to check that it's working before we move on to the reverse proxy.
Open up the Apache configuration file (/etc/apache2/sites-enabled/000-default-le-ssl.conf).
Before the closing </VirtualHost> we need to add a couple of things. Firstly, the Shibboleth handler location:
<Location /Shibboleth.sso>
                SetHandler shib
</Location>
And then a location that should be protected by SAML.
        <Location /private>
                AuthType shibboleth
                ShibRequireSession On
                ShibUseHeaders On
                require valid-user
        </Location>
The ShibUseHeaders directive isn't strictly required at this point but is useful if you want to delve further into retrieving attributes from the header on a local application (or passing them as part of the reverse proxy request!)
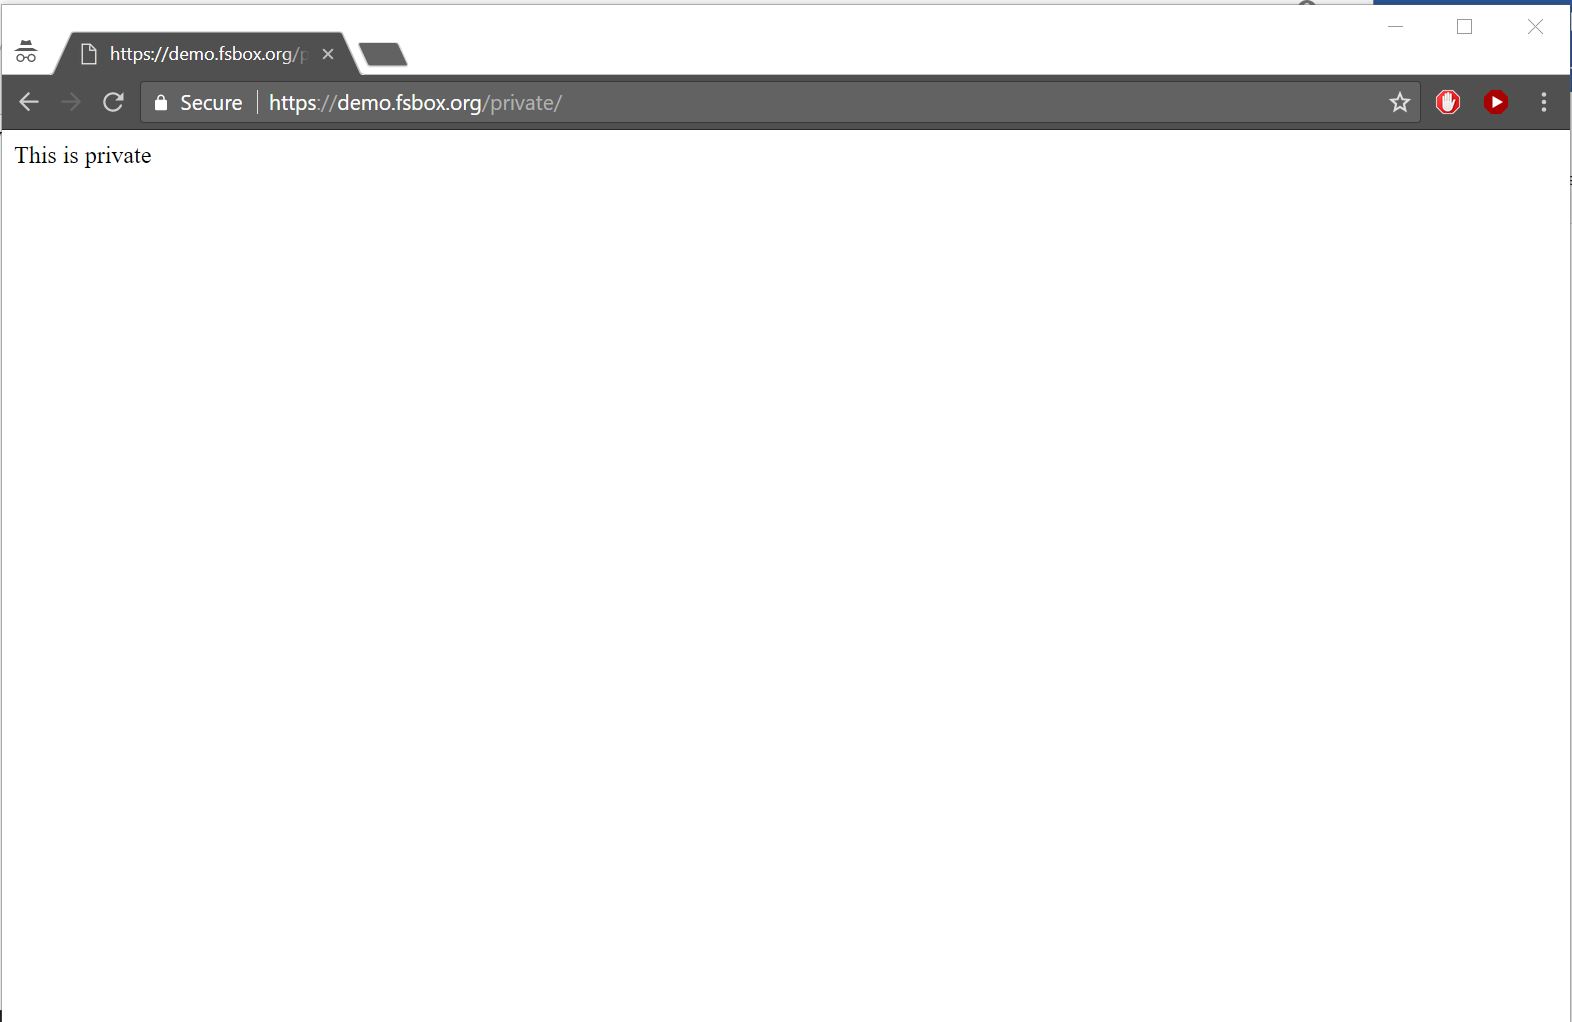
Let's create some very important private content:
jason@demo:/etc/shibboleth$ echo "This is private" | sudo tee /var/www/html/private/index.htmlRestart Apache and shibd:
jason@demo:/etc/shibboleth$ sudo service apache2 restart
jason@demo:/etc/shibboleth$ sudo service shibd restart
Check that the homepage is still here:
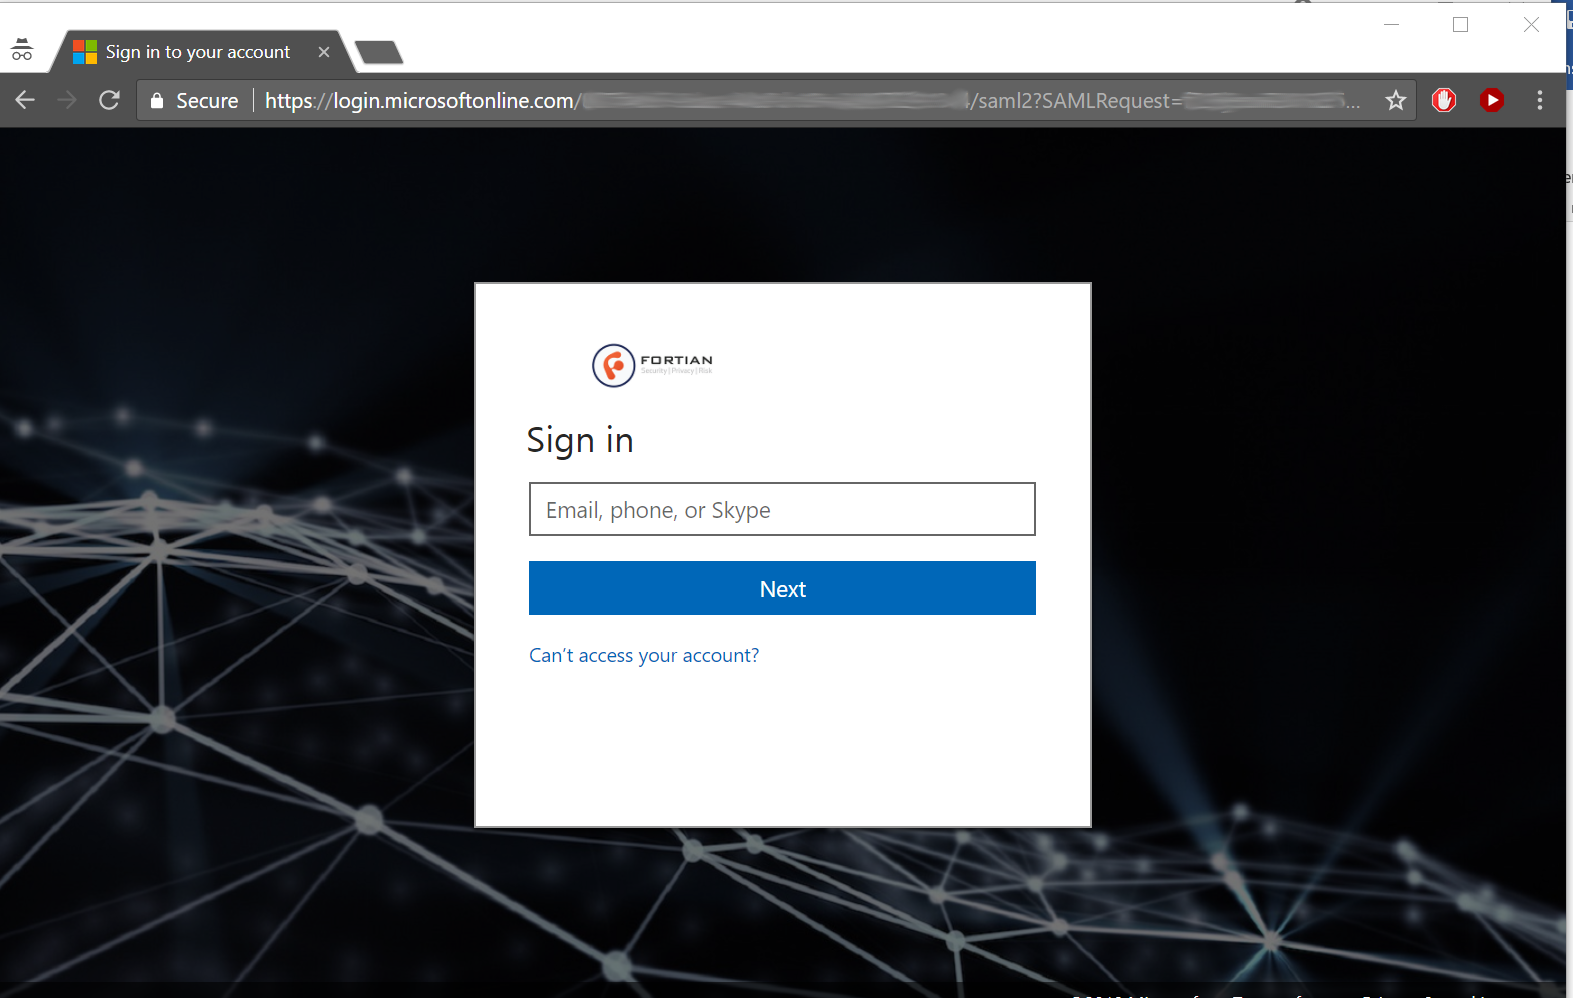
Cross your fingers, and head over to your site and private location (in our case https://demo.fsbox.org/private). If you're already logged into Azure you may want to use an Incognito window to ensure that you're actually authenticating properly:
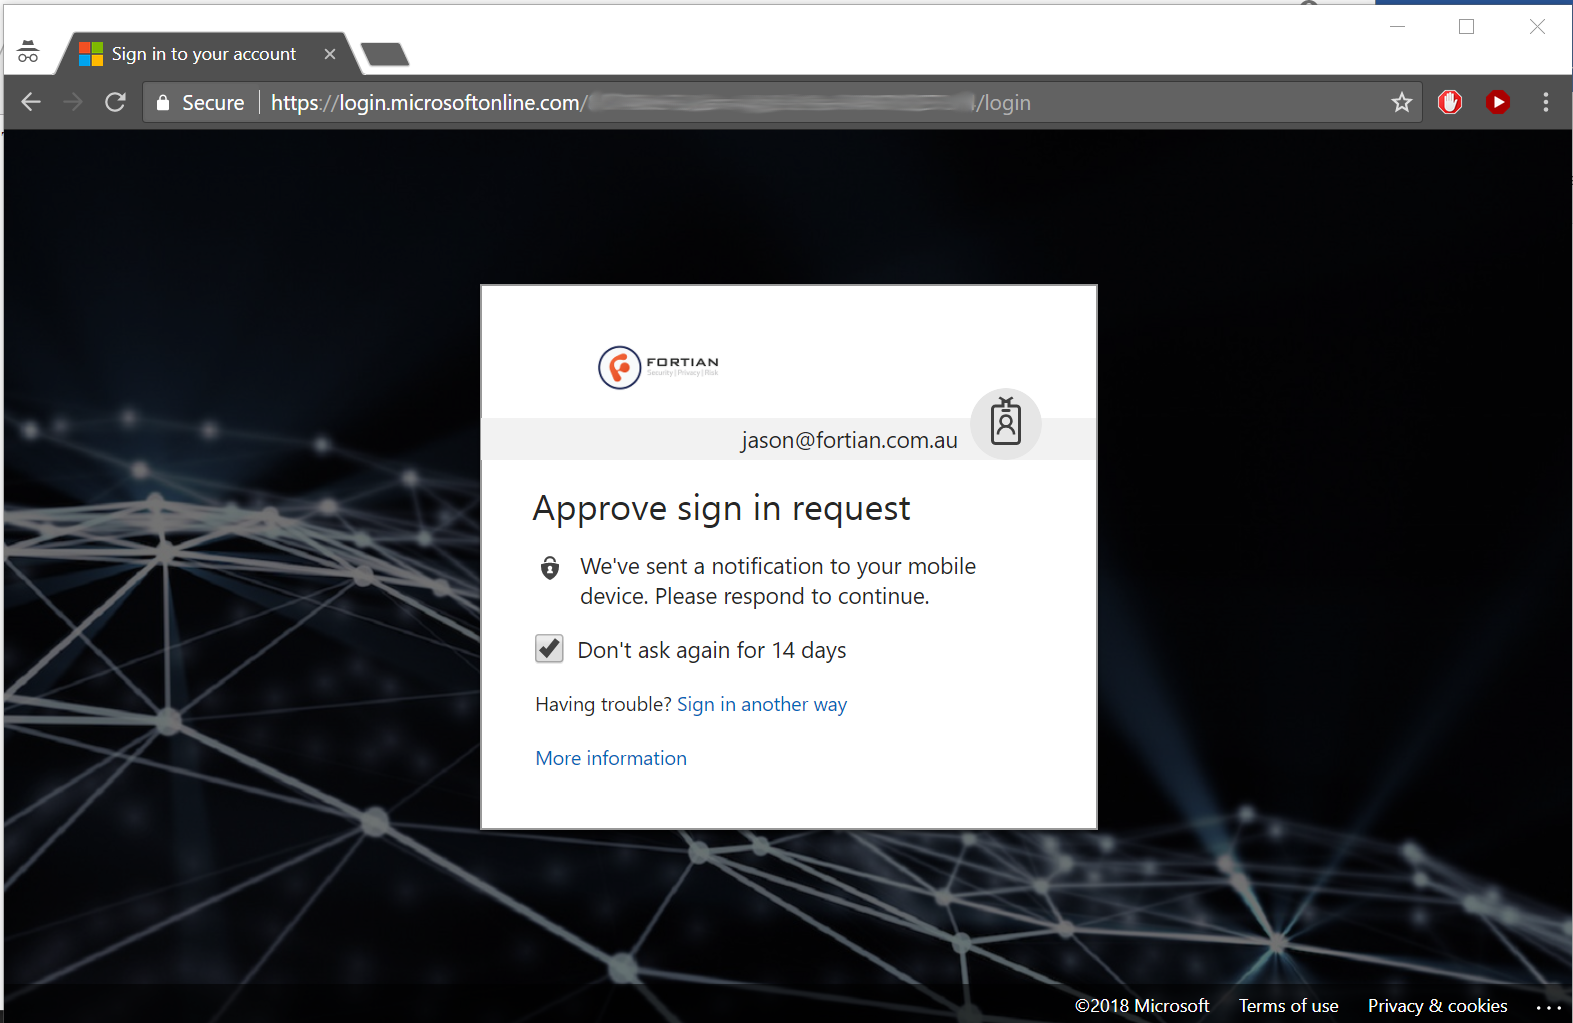
You'll even get push MFA if you've got it enabled:
And hopefully you should now have access to your super-secret content:
This isn't going to be a long tutorial on configuring Apache reverse proxy, that is many topics in and of itself, however as a simple illustration we'll reverse proxy our website with SAML authentication applied just to show how easy it is.
Firstly, let's enable a few Apache modules (a few more than we technically need for this, but useful if you want to extend beyond a very basic configuration):
jason@demo:/etc/shibboleth$ sudo a2enmod proxy proxy_http proxy_html shib2 ssl rewrite headers cgiAnd then back to our Apache configuration file (/etc/apache2/sites-enabled/000-default-le-ssl.conf) to add the reverse proxy elements:
        # Reverse proxy overarching config
        ProxyPreserveHost On
        SSLProxyEngine on

        # Remove certificate checking - don't do this for prodution, but it
        # makes setup a bit easier for testing.
        SSLProxyVerify none
        SSLProxyCheckPeerCN off
        SSLProxyCheckPeerName off
        SSLProxyCheckPeerExpire off

        # Reverse proxy statements
        Redirect 301 /fortian /fortian/
        ProxyPass /fortian/ https://www.fortian.com.au/
        ProxyPassReverse /fortian/ https:/www.fortian.com.au/

        <Location /fortian>
                AuthType shibboleth
                ShibRequireSession On
                ShibUseHeaders On
                require valid-user
        </Location>
One more Apache restart...
jason@demo:/etc/shibboleth$ sudo service apache2 restart... and we should be good to go! If you want the full experience, fire up a new Incognito session and point it at your test host /fortian (in our case https://demo.fsbox.org/fortian) and you should complete a full authentication and then be proxied through to your target content. If you enjoy this kind of thing and are interested in working with us please check out our careers page.
Request a consultation with one of our security specialists today or sign up to receive our monthly newsletter via email.
Get in touch Sign up!